• {Home}
  • {Contact }
  • { Disclosure }
  • {Guest Post }
  • {Join the STC Team }
  • {Christian Printables }

Satisfaction Through Christ

A Christian blog focused on faith, ministry, adoption, parenting, marriage, and more!

   
  • { About }
  • { Authors }
  • {STC Believes}
  • {Christian Adoption Link Up }
  • {Advertise }
  • { Where We Share }
  • STC Forums

DIY Faux Potted Grass Spring Decoration

April 3, 2014 by Christie 16 Comments

Easter Spring Decor
DIY Faux Potted Grass – Simple. Elegent. & Did I Mention Inexpensive?
Southern porches covered in tulips, lacy ferns, a creaky swing and a rustic table with glasses of lemonade. The very first, tiny but strong, sprout-lets in the family garden, and of course, the door is hanging wide open because the air is a perfect combination of warm spring and coastal breeze.

It’s a beautiful picture isn’t it? Much like those gorgeous spring mantles that the Martha-esque blogs produce every year. A touch of wicker and galvanized metal, an antique mirror, flowers by the dozens and mossy greens galore. You’ve seen them, right? Gorgeous, and they cost a fortune, much like the faux potted grasses that are intended for green decor year after year.

Consider this miniature potted grass decoration. It’s only 18 inches, but retails for $70.00! Well, as much as I love living and artificial greens in my home, that price tag simply isn’t in the budget.

comparison
Photo Credit: Linens-N-Things

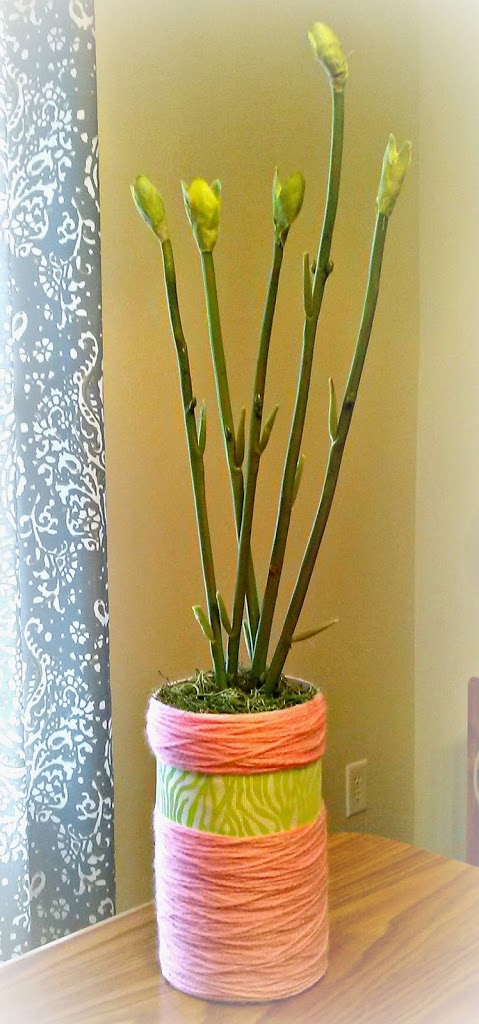
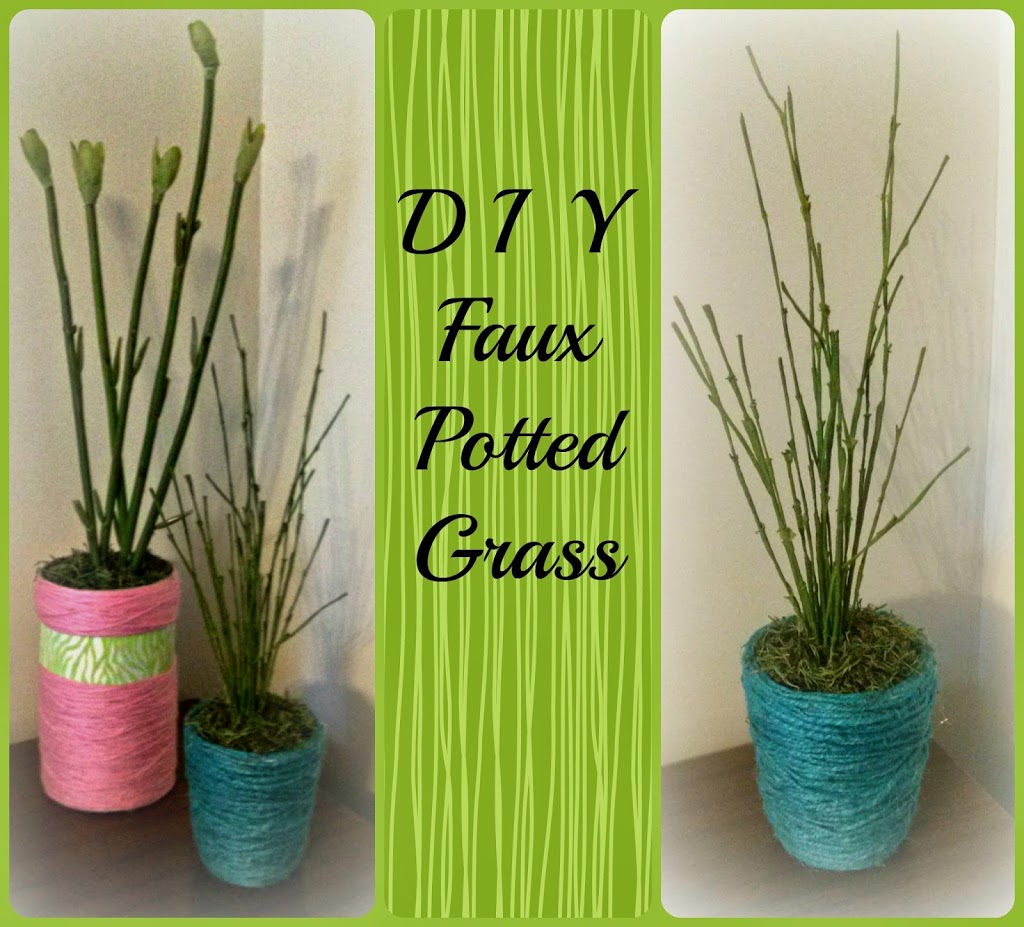
So I’ve created my own, adorable, extra springy faux potted grasses, for pennies. Really and truly, I did not purchase a single new item for these creations, I simply dug into my craft stash of leftover materials. DIY is so very much like a recipe, so here are your ingredients!

  • empty container (I used recycled snack/breakfast containers from my kitchen)
  • floral stems (I had some leftover, after removing the blossoms. Pluck the fake blooms and save them for another project! Extra thin twigs, spray painted green will also work!)
  • fabric scraps or packaging material 
  • dried moss (I used reindeer moss)
  • twine, yarn, or ribbon of your choice
  • hot glue gun and hot glue
diy materials
Step One: Use the twine or yarn of your choice to wrap the empty container. Start at the very center of the bottom of the container. Add a thin line of hot glue as you wrap the container, and carefully press the twine into the glue. You’ll get faster as you go, so don’t worry if you have a few bumpy rows at the beginning. Do try to keep the rows as close together as possible. Wrap all the way to the top, adding a row onto the top of the rim. Cut the twine and add a discreet dab of hot glue to keep it from unwinding.

wrap
Step Two: Place the floral stem into the container, you can use several at different heights if you want a fuller look. (Use a pair of wire cutters to chop the stem if it is too tall.) When satisfied with the height, begin filling in around the stem with fabric scraps, packaging material, whatever you’ve got! Pack tightly to offer the most stability to your “grass.” Fill the container up to within an inch of the top rim. If you are concerned about stability, you can use hot glue in the bottom of the container to secure the stems.
filler
Step Three: Add the moss! You’ll want to pack this tightly at first, until you have a full layer and cannot see any of the filler below. Then pack more loosely to achieve a natural look. If you’re not wild about moss or don’t have any on hand, you can also use decorative marbles or stones, wood chips, raffia, or Easter grass.
finished largefinished smallpinnable2

One thing I simply adore about spring time is that there is a refreshing simplicity that comes with new life. I hope if you try this project you enjoy the simple, decorative beauty, like I do! If you give it a whirl, let us know how it turned out; get creative and show me what you come up with!
signature
Check out this month’s featured site!
The following two tabs change content below.
  • Bio
  • Latest Posts
My Twitter profileMy Facebook profileMy Google+ profileMy Instagram profileMy Pinterest profile

Christie

Christie is a stay-at-home mom to two beautiful little girls, a pastor's wife, and lover of Jesus. Her hope is that STC would be a source of encouragement for women all over the world!
My Twitter profileMy Facebook profileMy Google+ profileMy Instagram profileMy Pinterest profile

Latest posts by Christie (see all)

  • Remembering Mandy Kelly from Worshipful Living - March 29, 2017
  • Homosexuality Should Not Polarize the Church - November 17, 2016
  • Grace & Truth {Week 69} - May 6, 2016

Filed Under: Crafts, DIY, home decor, Shirley, Spring

Comments

  1. Cari Dunn says

    April 3, 2014 at 11:03 am

    Cute! I love repurposing and upcycling. I’m pinning this to my Girl Scout board to do with my troop this spring!

    Reply
    • Shirley Ann says

      April 3, 2014 at 12:47 pm

      Cari, I do hope you try it! And it’s definitely not to hard to try with younger girls! I’d love to follow you on Pinterest if you comment back with your pin-name! 🙂 Thanks for commenting!

      Reply
  2. Cathy Carroll says

    April 3, 2014 at 11:09 am

    This is really a cute idea and a great use of those throw away containers… Cathy

    Reply
    • Shirley Ann says

      April 3, 2014 at 12:49 pm

      The second container is a small oatmeal container! We go through a lot of those. I’m curious to see if anyone tries this on a really large scale and if so what they use! Thanks for stopping by!

      Reply
  3. Louida Martin says

    April 3, 2014 at 11:10 am

    This is very creative! I’m so not a DIY type person but this looks like something I could do. Thanks!

    Reply
    • Shirley Ann says

      April 3, 2014 at 12:51 pm

      I haven’t always been a DIY-er I started with the easy stuff and now I’m hooked! This project is really very easy, so go ahead and give it a try! (Plus if you put it up on a higher shelf no one will notice if it’s not completely perfect.) 🙂 Thanks for commenting!

      Reply
  4. Zakkiya Hamza says

    April 3, 2014 at 12:25 pm

    Oh definitely doable and so very easy. 🙂 Thanks for sharing this!

    Reply
    • Shirley Ann says

      April 3, 2014 at 8:34 pm

      Thanks! “Doable” and “easy” are my favorite ways to craft!! 🙂

      Reply
  5. Susie Jax says

    April 3, 2014 at 6:10 pm

    O my that is awesome. I think I will make some of those too! Very good! I am so happy to of found you via Thriving Thursday. You have an awesome site!!!I look forward to your visit at homemaker-mom.com

    Reply
    • Shirley Ann says

      April 4, 2014 at 7:51 am

      Thanks so much Susie! Have fun trying this out!

      Reply
  6. Anne says

    April 8, 2014 at 2:24 am

    What a clever idea. Thanks for the inspiration! I found your post through the Marvelous Mondays link party.

    Reply
    • Shirley Ann says

      April 8, 2014 at 2:14 pm

      Thanks! So excited you stopped by!

      Reply
  7. Ashley @ 3 Little Greenwoods says

    April 8, 2014 at 7:05 am

    Great idea to using all the pieces of the flowers! And I so agree about not paying a tons of $$ for grass in a pot. 😉

    Thanks so much for sharing your post with Show-Licious Craft & Recipe Party! Show to see you back next week!

    ~ Ashley

    Reply
    • Shirley Ann says

      April 8, 2014 at 2:15 pm

      Thanks Ashley! I just couldn’t justify throwing those empty stems away! Love how it turned out. 🙂

      Reply
  8. PioneerMomma says

    April 14, 2014 at 1:08 am

    Love this idea! Especially how easy and inexpensive they are to make. Thanks for sharing, your post will be featured in tonight’s What’d You Do This Weekend! Pinned 🙂

    Ashley @ PioneerMomma.com

    Reply
    • Shirley Ann says

      April 14, 2014 at 11:12 am

      Thank you Ashley! So glad to hear it! If you want you can tweet me a link @ABowForMama and I’ll be glad to retweet it! I’ll most likely pin it as well! Thanks for stopping by.

      Reply

We're eager to hear your thoughts! --Let's chat-- Cancel reply

echo adrotate_group(2);

Our Favorite Shops

echo adrotate_group(1);
Visit Christie H.'s profile on Pinterest.
Follow this blog

Connect with Us


Satisfaction Through Christ · Copyright © 2015 · Site Design by: Fantastique Designs

This website uses cookies to improve your experience. We'll assume you're ok with this, but you can opt-out if you wish.Accept Read More
Privacy & Cookies Policy

Privacy Overview

This website uses cookies to improve your experience while you navigate through the website. Out of these, the cookies that are categorized as necessary are stored on your browser as they are essential for the working of basic functionalities of the website. We also use third-party cookies that help us analyze and understand how you use this website. These cookies will be stored in your browser only with your consent. You also have the option to opt-out of these cookies. But opting out of some of these cookies may affect your browsing experience.
Necessary
Always Enabled
Necessary cookies are absolutely essential for the website to function properly. This category only includes cookies that ensures basic functionalities and security features of the website. These cookies do not store any personal information.
Non-necessary
Any cookies that may not be particularly necessary for the website to function and is used specifically to collect user personal data via analytics, ads, other embedded contents are termed as non-necessary cookies. It is mandatory to procure user consent prior to running these cookies on your website.
SAVE & ACCEPT