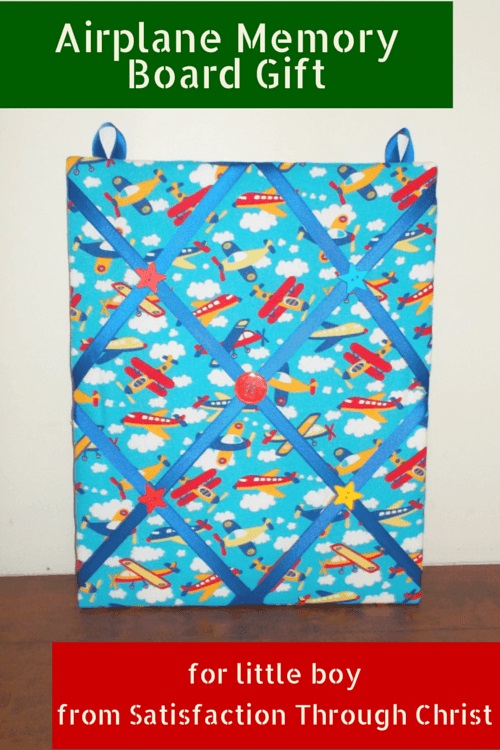
A DIY Gift for Boy or Girl – Adaptable to Any Age
Merry Christmas! Yes, I am one of those gals who thinks about Christmas six months out of the year. But the good news is – it gives many plenty of time to work on some amazing DIY Christmas gift ideas!
Like this Do-It-Yourself Memory Board
Make It for Ten Dollars or Less!
Here is what you’ll need:
a canvas from an arts and crafts store, in the size you’d like (these are 16×20) about $3 each (bought the two packs on sale!)
you can use cork boards of course, but they’re more expensive.
quilting batting or equivalent – about $2, or use something soft and fluffy, but not lumpy that you have on hand to make it even more thrifty.
fabric – choose something that pulls taut, but that doesn’t have a stretchy quality – about $4 for 2/3 of a yard (for this size canvas) TIP: you may want to iron your fabric first. Do not iron it after putting it on the board and batting. (The batting may melt.)
ribbon – you can choose your width although I’ve found the one inch size works best. $1
staple gun – NOTE, do not use an air compressor gun, there is a good chance you’d shoot the staple through the canvas.
hot glue / hot glue gun
Step One:
Gather your supplies. Cut and measure your batting and fabric. Glue the batting onto the front of the canvas. Make sure it’s smooth, bump free. Then align the fabric so it will be straight (you can make your board vertical or horizontal!) begin to staple it to the back side of the frame.
Make sure that your staples are going into the wooden part of the frame and not through the back of the canvas. (I’m sure you can understand why! Ha!) TIP: I like to do the two longest sides first, and then neatly fold and tuck the ends before stapling.
Step Two:
Measure and cut your ribbon. You can measure by hand simple by holding the ribbon from corner to corner diagonally. You’ll need two of that length, and then four short pieces from the middle of each side to the middle of the next side.
Do the corner to corner ribbons first. Just staple them around the back. Next start with one ribbon at the very middle of the top (you’ll want to measure for this or it will come out off!) Keep turning the board to the right and adding the next ribbon and stapling it’s other end. I seriously highly recommend that you measure during this step.
Step Three:
Next cut two short pieces of ribbon, about 7 inches long. Loop them and staple one to each corner. Make sure that both ends of this piece of ribbon are securely under at least one or two staples. As you can see I prefer 8 or 9 staples. Ha!
Or, if you’d rather not have hanging tabs, you can cut out small swatches of cloth and install Command strips. (Decide this in the beginning so that you don’t have a staple where you need to install the Command strips.
That’s it! But for a little extra embellishment you can add super cute buttons to each of the cross points of the ribbon. If you use over-sized buttons you can even stack them for a fun look! Now you’ve got an easy, inexpensive, do it yourself Christmas gift idea!
And it happens to be a great idea for boy or girl, any age, including adults! Christmas gifting doesn’t get any easier, or more personalized than that!
Of course, I will say that this is one DIY Christmas project that is a tad easier with a helper. My mom and I worked together on five (pictured) for my nephews and nieces.
The Finished Boards!
We took breaks. But I would say we put all of these together in about half an hour apiece. Not bad for such an adorable Christmas present!
What do you say? Are you planning on giving it a try?
Latest posts by Shirley (see all)
- The Why’s and How’s of Choosing Homeschool Curriculum - April 26, 2016
- Life Verses for a Radical Modern Faith - April 4, 2016
- Marriage And Friendship – Practical Tips for Becoming Your Spouse’s BFF - March 30, 2016


There is also IPhone app for that (What to get my boyfriend), its very nice. It asks you questions about relationship and his character and in the end it gives you suggestions, of course you can set the budget and also his birthday reminder. There is a bunch of pretty cool (also DIY) ideas.
I usually don’t have a hard time coming up with gift ideas; I love the challenge of it, but it is cool to know there is an app out there for that!